
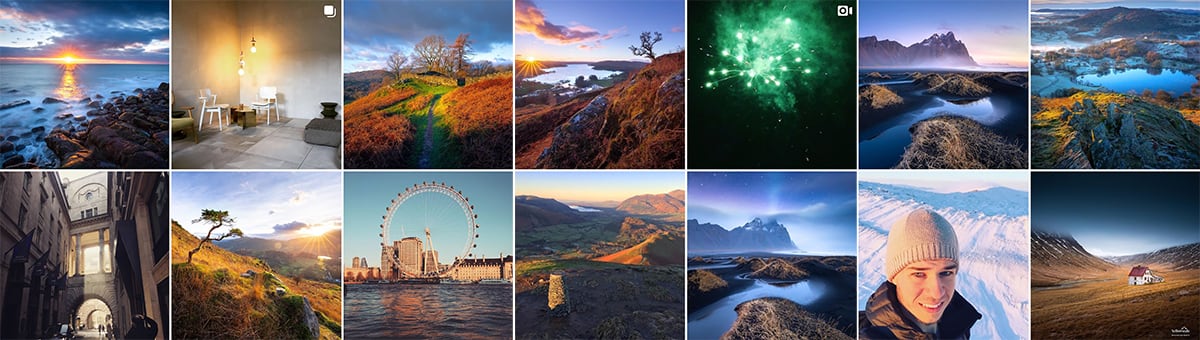
For the last few months I’ve been working on a new YouTube channel called TL;DR: a JavaScript screencast series for working web developers. Since starting my travel sabbatical back in November of 2018, I’ve been building my own training brand and assets in hopes that I can strike a healthier balance between teaching, travel and photography.
This is my second time launching a YouTube channel. My first one — Yellowscale — is mostly recorded on the road in hotel rooms and the fells of the Lake District. That worked great for my target audience, and I hit 1000 subscribers in about 7 months.
But TL;DR needs to reflect my teaching style in a classroom or workshop, so this time I felt it was important to improve the production value.
Just one problem: I’m still a digital nomad. Even after returning to the US, I’ve moved on average every 2 months. And I’m still planning to hit the road again.
Is it possible to have a nice, compact recording studio that’s easy to pack up every couple months, and flexible to most spaces — without spending a fortune?
Well, sorta. It won’t fit in my carry-on backpack, but it’ll move from place-to-place when I’m back in the states. Here’s an overview of my (mostly) nomadic-friendly setup, with links to the things!
Studio Equipment
4x LED Light Panels
4x Neewer 660 LED Panels. I am seriously in love with these: they are stupid bright, came with decent barndoors, wall plugs and light stands, put out a high CRI light, and run cool. Since I’m recording in small spaces and have to kill AC, it’s hard to overstate how important that is!
I use 3 of the panels for subject lighting (me!): key light, fill light and rim light. I use the 4th panel with a gel to color the backdrop depending on the look I want. On TL;DR I don’t use the 4th light, but I probably will for new Yellowscale vlogs.
Smartphone Teleprompter
Parrot Teleprompter 2 For Smartphone. You may be fine without a teleprompter, but to record my TL;DR episodes with any hope of getting them near 5 minutes, I absolutely have to script it. And there’s nothing more awkward than staring off into space rather than your audience. This slides right over any lens — slap an old smartphone in, and boom! You’ve got (mostly) flawless takes on the first take.
1x Softbox
Neewer Collapsible Softbox Diffuser. The LED light panels produce a decently soft light, but the key light wasn’t soft enough. This little diffuser does a great job, especially in tight spaces where a traditional softbox or umbrella would take way too much space!
Lighting Accessories
Neewer 12x12 Pack of 8 Colored Gels. Since LED panels run cool, nothing fancy required! Just attach them to the barndoors with a binder clip.
2x Neewer 10” Gooseneck Tube Arm. To get my key light as close as possible, I needed these to “crane” the lightbox above me. Super sturdy since the LED panels are so light.
Blue Yeti USB Mic
Blue Yeti USB Microphone, Black. I’ve been recording with a Yeti for a year now, and love it.
Audio Accessories
- Auphonix Shock Mount. A must if you’re planning to type on the same surface the mic is mounted to!
- InnoGear Boom Arm Stand. Get’s the mic out of your way and closer to you, plus it kills some vibrations!
- Sure-Max 12 Heavy-Duty Moving Blankets. My “acoustic treatment” pièce de résistance for killing room reverb. These aren’t good for a monitoring setup, but they do a great job for recording! My room was an echo chamber before treatment. Easy to hang with some binder clips and wire hanger nails.
- Pop Filter. Literally any will do.
Yes, nomads can have a studio!
That’s it! It’s not part of my ultralight digital nomad packing list, but it’s compact and flexible enough not to hold me back from new adventures.
By the way, if you’re a web developer and want to level up your craft, subscribe to the TL;DR channel for rapid codecasts on design patterns, refactoring and development approaches.
And if you’re looking for someone to train your developer team, get in touch at [email protected]. I’m a digital nomad, so I can come to you! I provide custom training solutions through immersive bootcamps, workshops, seminars and speaking engagements. ⚛️ React, Node.js, Web… give me a shout!
]]>
Updated May 2019 for warm weather! Check out what’s new.
What’s the easiest way to travel? With one carry-on sized backpack. It sounds crazy, but every digital nomad packing list I see tends to converge to this utopia, and it’s not surprising why.
No checked bags means:
- No wait to check bags or surprise fees
- No lost baggage
- You can use budget airlines
Traveling with one carry-on bag means:
- Much less stress during transit and fewer missed layovers
- No repacking between hotels and fewer misplaced items
- Less stress if your rental car gets smashed
In a word, traveling light with one carry-on sized bag is freedom.
As a digital nomad, honing your one bag packing list will help turn your dream of traveling around the world indefinitely into reality, and now is the time for you to practice.
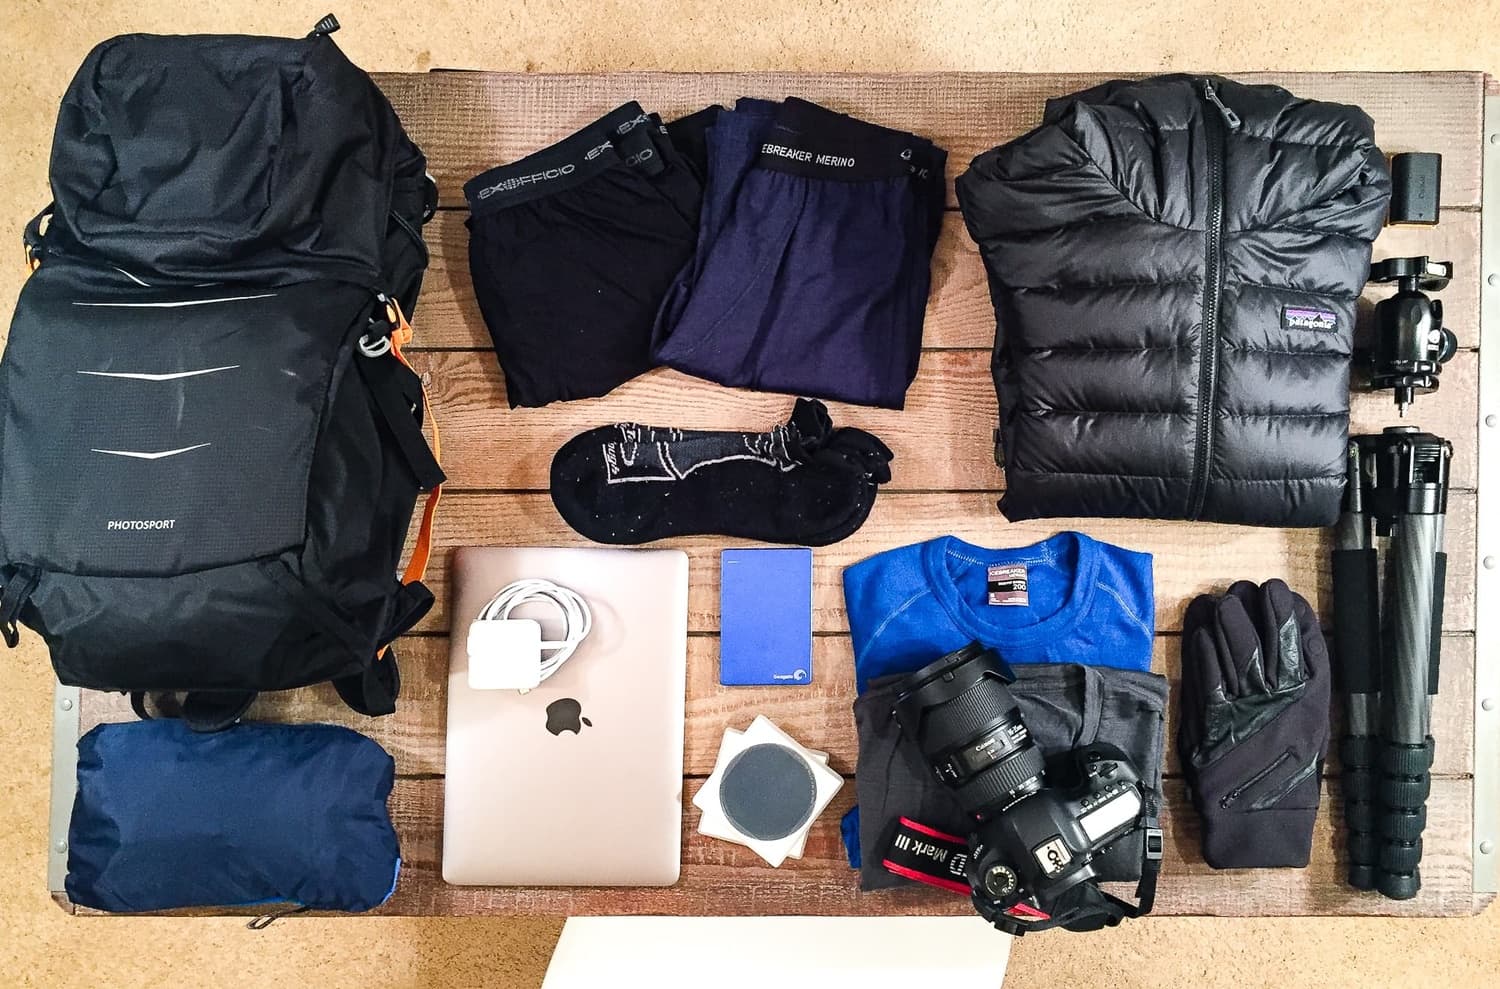
I didn’t instantly cut down my existence to one bag: I’ve spent years learning what I can and can’t get away with. To expedite your journey, here’s my entire minimalist packing list for a <10kg pack. It’s long, so here’s a table if you want to skip around.
Recent Updates
- 9/9/2019: Stay tuned for some nomad-friendly vlogging gear! I wasn’t happy with my action cam overseas, so a new ultralight rig is in the works.
- 4/29/2019: A.K.A “The warm weather update!” I finally found do-everything shorts that blow my mind, a tiny laptop charger that replaces three, no show merino wool socks, a slim wallet, and deodorant that isn’t a pain to wash out of merino wool shirts.
- 1/13/2019: I’ve finished testing travel pants! Also, new ball head recommendation.
- 10/25/2018: I’ve included some recommendations to get your pack under 10kg (Norwegian’s carry-on weight limit). Also, I’ve added details on in-progress testing on travel pants!
2019 Ultralight Packing List
Bags
Lies. Actually, I… don’t… have… recommendations yet! I’ve traveled for a year with a Lowepro hiking bag — it works, but I’ve not been overly happy with it. So until I find the perfect bag, I’ll hold off on a recommendation.
However, if you aren’t traveling with camera gear, go with a daypack instead of a full-blown backpack. I love my 17 liter North Face daypack (discontinued, here’s a larger one if you’re less lucky at T.J.Maxx), but there’s not anything particularly special about it other than the size. Thanks to a strict packing regime, it holds everything I need for indefinite travel… without camera gear.
Also, don’t forget to pack a foldable nylon daypack. Bag inception. It takes almost no space, and after your flight you can shove clothes and toiletries in it so your main bag sheds some weight.
Clothes
I’ve spent a few years honing my ultralight wardrobe, and a few characteristics apply to everything. First, eliminate any clothing that is 100% cotton. This is a non-negotiable: you won’t exactly wash your clothes everyday, and cotton will be unpleasant during use, smell awful after use, and turn to rock once you get around to washing it. Why pack 10 cotton tees that fit so-so and are miserable in hot weather, instead of owning 3 shirts that look great and are made of materials that perform well in inclement weather?
Your wardrobe should be primarily made of nature’s miracle fabric, merino wool. It resists odors, keeps you cool in the heat and warm in the cold, and air dries without turning to rock. Even when I’m not traveling, merino wool is pretty much the only fabric I own. Yes, it’s pricey — but you only need 2–3 of most items, and you won’t purchase them often. It’s a small price to pay for legendary comfort and not smelling like a vagabond.
I follow the three-layer system: a merino wool base layer, a down jacket for the mid layer and a rain jacket for the outer layer. Whether I’m headed for 80 degrees or 20 degrees, I’m covered!
Here’s the entire clothing list:
Shirts
3 Icebreaker merino wool shirts for the base layer: a short sleeve and long sleeve will cover a wide range of temperatures. Merino wool comes in a lot of grades and weights, so it’s not a place to skimp. Short sleeves are generally thin and come in a weight of 150 g/m2 (grams per square meter), while long sleeves are a thicker 200 g/m2. I travel with 3 variations:
- A dressy black Icebreaker Anatomica V-neck, with a fabric weight of 150 g/m2. It’s well fitted, so it looks great solo or layered under anything. Lately these are getting hard to find at less than retail price, so you might have to do some googling if you can’t find a color and size you like. If V-necks aren’t your thing, I own a crew version as well that served me well.
- A thicker Icebreaker Oasis Crewe, which comes in 200 g/m2. It seems discontinued, but there’s a newer lookalike with the same specs, Icebreaker Everyday Crewe. The crew is slightly less fitted than the Anatomica lineup, but look greats and has seen the most use — even in warmer climates.
- A long sleeve Icebreaker Everyday Long Sleeve Tee in 200 g/m2. I use it in two extremes: when it’s below 30 degrees outside, or when it’s hot and sunny. It sounds counterintuitive, but the long sleeves keep the heat off you while wicking away sweat, so it’s often more comfortable than a short sleeve and wearing sunscreen.
Down Jacket
Patagonia down jacket. You can’t beat a down jacket for weight to warmth ratio, but like merino wool, a down jacket isn’t just for the frozen fjords: it acts as an insulator in moderate temperatures. I frequently wear a merino base layer and down jacket in 50 degree weather and don’t notice the warmth.
Down jackets don’t have to break the bank: before upgrading to my Patagonia down jacket, I used a $50 REI Coop jacket that still does a great job. In fact, it fits more easily in my camera bag.
Rain Jacket
Outdoor Research Helium HD rain jacket. The outer layer doesn’t see constant use like the base and mid layers, but it’s indispensable for any traveler. A DWR-treated down jacket is not enough: the third layer is meant to provide real wind and water protection. You should always have a rain jacket handy, so I opted for the best ultralight option I could find. Fair disclosure: because I use rain jackets infrequently, I haven’t put my HD under too much stress, but so far it’s been a huge upgrade from my clammy North Face Venture jacket.
If you are willing to forego a few features, go for “the” ultralight champion: the Outdoor Research Helium II rain jacket. This is the #1 recommendation in ultralight jackets, and it’s cheaper than the HD! I went with the HD for one reason: I need pockets. Otherwise, the Helium II would have been my clear choice.
Socks
2–3 pairs of Darn Tough merino wool socks. There’s nothing worse than rotten smelling socks after a day of hiking. These socks are worth every dollar — they keep the feet comfortable in all climates, have lots of cushion, resist odor, and are pretty easy to hand-wash. I’ve worn the same 2 pairs every day for 3 years.
I have 2 pairs of Darn Tough’s 1/4 style, which are my favorite to wear, and for shorts weather I have 2 pairs of Darn Tough No Shows. Supposedly Darn Tough will replace the sock if it gets a hole, but I haven’t yet needed to take advantage of that.
Update: I love Darn Tough’s 1/4 style socks, but haven’t been 100% sold on their no shows, which actually show. After a month of non-stop wear, I can highly recommend FITS Light Runner No Show merino wool socks.
Leggings
1 pair of Icebreaker Oasis merino wool leggings to go under your jeans in sub 30 degree weather. With some luck, sometimes you can snag a pair out of season for $20 at a T.J.Maxx.
Jeans
1 pair of Outlier Slim Dungarees. I’ve done a lot of research searching for the perfect pants, and though the Dungarees are my overall recommendation, here are 4 excellent options to accomodate any budget:
- Best looking, priciest option: Outlier Slim Dungarees. Great for colder climates, I’m pretty sure these will last longer than anything else I wear. The fit has been tricky: I’ve exchanged sizes twice, as despite being slim, the waist measurement is different from most of the pants I’ve purchased. The legs are intentionally long, so plan to get them hemmed. Oh, these have a liquid-repellant treatment — good thing, I spilled some coffee on them the other day.
- Feel great, mid-price option: Bluffworks Tailored Chinos. I have to say, I love these: they were a bit resistant to squats at first, but with a little working in these feel amazing and had the best fit of any pants I’ve ever worn, period. Super lightweight. I’m inclined to grab these for warmer (40℉+) climates: they breathe well, and I didn’t sweat once while city exploring. However, in chillier climates these feel a bit too thin — definitely pair with merino wool leggings.
- Stretchy budget option: prAna Brion pants. These DWR-treated pants feel amazing for hiking. Unlike the Outlier and Bluffworks, these have some vertical stretch that’s especially useful for intense hikes, or squatting for a shot. These look great: I wouldn’t have qualms about wearing them to a training engagement. Waist fit is great, but legs are a little long. Don’t expect these to last long: after some in-depth searching, it sounds like they aren’t especially known for durability.
- Any jeans with > 20% polyester. Polyester mix jeans are incredibly durable, insanely light, comfortable and surprisingly stylish even on business trips. They hold their shape well and dry out quickly. Keep an eye on your local department stores and you may find a pair of $20 with patience. Whatever you do, don’t travel with cotton jeans — your everything thanks you.
Shorts
1 pair of Outlier New Way Longs. I can’t tell you how many years I’ve searched for good shorts. Amazing travel shorts have to be nothing short of miraculous to meet all these constraints:
- Look nice enough you’d wear them to work.
- Fit on the slim side without restraining motion.
- Ultralight, wrinkle-free material.
- Stretch for hiking and cycling.
- No frills or cargo pockets that scream “tourist!”
- Fast drying technical fabric that resists the ocassional splash.
- Don’t look or feel like gym shorts.
Well, the same folks who make my favorite travel pants have released shorts that are quietly rocking my world. The Outlier New Way Longs have a fantastic fit that looks great in the office and on the trail.
The super lightweight, thin technical fabric feels surprisingly durable, so it’s hard to go wrong. I wear these every day in town, on the trail, and for an hour bike commute every day. These are the real deal. That sounds like a sales pitch, but seriously I’ve gone years without shorts. Oh, these also have drawstrings so you can take them for a swim!
As with Outlier’s pants, the sizes run a size or two large — or perhaps I’m just losing weight from all the walking and cycling!
Underwear
3 pairs of ExOfficio Boxer Briefs. Yep, time for fancy underwear. Anything that isn’t 100% cotton will do, but polyester is the way to go since you have to sink wash them every (other?) day anyway. My pairs pilled a bit when I first got them, but haven’t gotten any worse after 2 years of constant use.
A word of warning: lately ExOfficio seems to be having quality assurance issues. My brother just got the ExOfficio Sport Boxer Briefs and it started sticking to itself and pilling like crazy after one sink-wash — disappointing to say the least. The original ExOfficio Boxer Briefs aren’t as comfortable for hiking, so the Sport was on my upgrade list, but I think I’ll wait till quality control gets their act together.
Shoes
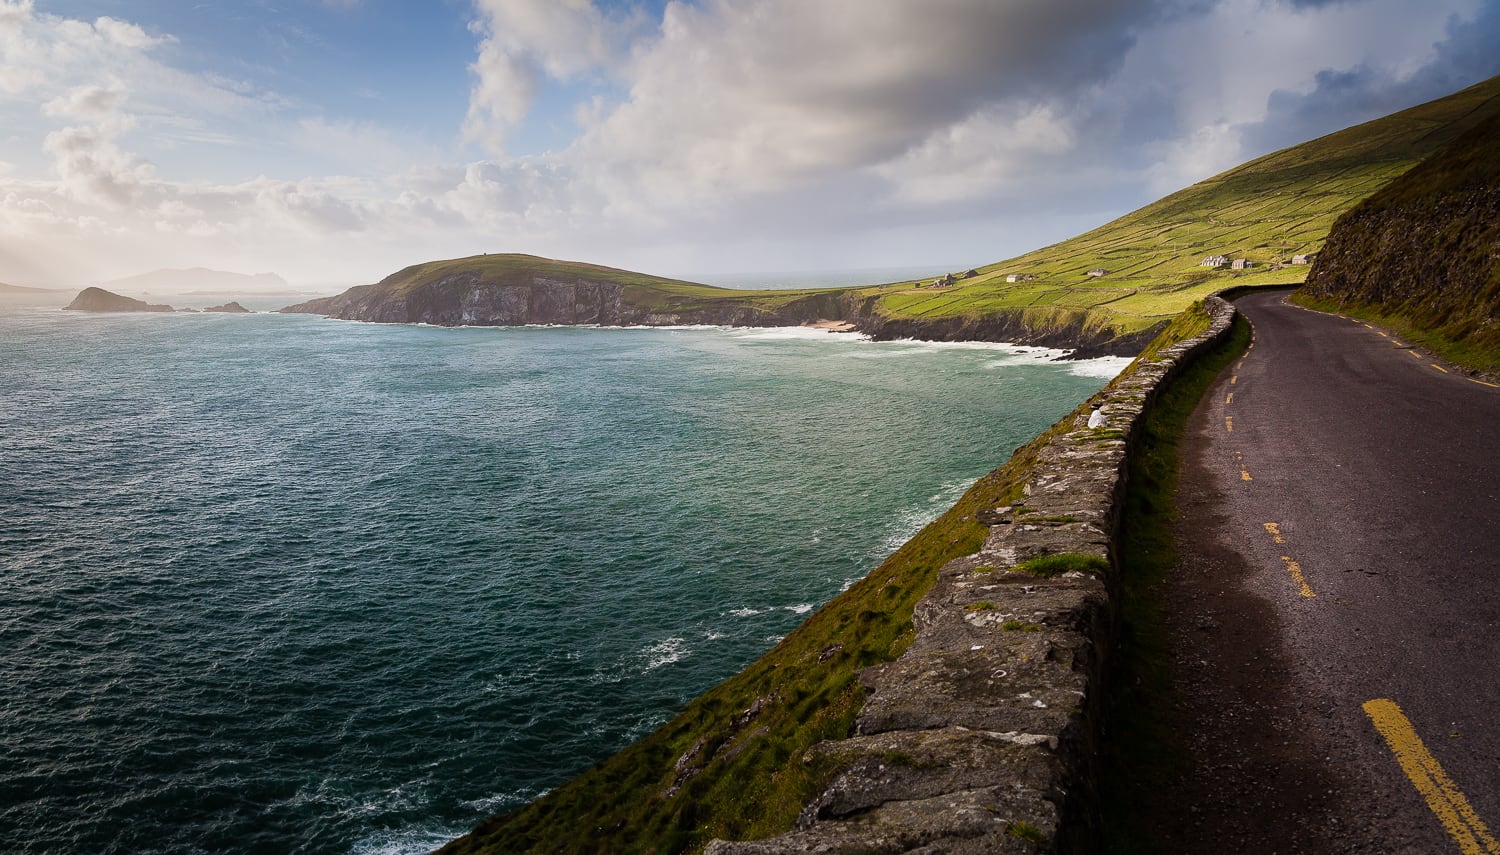
1 pair of waterproof Merrell Gore-Tex hiking shoes. I’m not sold on the look, but hiking shoes are definitely my go-to travel shoes for city trekking and hiking in the Lake District fells.
Wallet
Infinity Minimalist Wallet. I only carry 4 cards, and for security I keep my wallet in my front pocket. This teeny tiny wallet keeps my slim travel pants slim, but has an expanding slot for the ocassional krona.
Tech
Smartphone
Any smartphone except an iPhone Plus or Samsung Galaxy. A giant phone screen will be your enemy as a nomad: many of the travel jeans don’t have a large enough pocket, and given the amount of walking and hiking you’ll be doing, a large screen will either get bent or smashed.
Laptop
12” MacBook or 13” MacBook Pro. Lugging around a 15” brick is out of the question. I’ve switched between the 13” and 12” over the last few years, and I’m torn: the 12” is the last word on portability and plenty powerful for everything except editing photos. If I can find a backpack I like and cut down the weight of my camera gear, I’ll probably go back to the 13-incher. C’mon Apple, work your magic!
Laptop Charger
Innergie 60C USB-C Charger. The bulkiest, heaviest part of my pack has always been my MacBook charger. Over the past year, I’ve spent days researching chargers and tried a few during 4 months on the road. After the horror of having three chargers fail on me overseas, I finally found one that gives me faith in electronics again.
This is one of the smallest, lightest 60 watt chargers our there, and is a true replacement for Apple’s 61 watt chargers. Because it’s USB-C, it has also replaced my USB wall chargers for my iPhone, headlamp, and action camera. Pro-tip: grab the teeny tiny nonda USB-C to USB 3.0 adapter to charge any USB device.
Yes, this is an expensive charger — probably the most I’ve ever paid for a charger, period. But if I’ve learned anything after 4 months overseas, it’s that nothing will cripple you faster or give you more anxiety than a flakey laptop charger. I lost days of shoot time and spent hundreds of dollars replacing chargers with whatever I could find in an electronics store, and in Iceland or the Lake District, your options aren’t overwhelming.
Headlamp
Hiking headlamp like the Black Diamond Spot. I prefer a USB rechargeable one so I don’t need to carry backup batteries (more weight and space), but haven’t yet tested out the Black Diamond ReVolt.
Adapters
Amazon Basics USB-C adapter. Yeah, you can pay 50% more for Apple’s, but from the reviews it seems notoriously glitchy. On the off-chance my Amazon Basics version goes bad, I also tote the teeny tiny nonda USB-C to USB 3.0 adapter.
Plug Adapters
2 OREI plug adapters for mainland Europe and the UK. Keep in mind that these plugs do not convert the voltage, so check all your electronics to make sure they can operate on the country’s power grid. Most smartphones, laptops and camera gear work with 240V out of the box, but always double check lest you fry your gear and hotel room.
As I expand my list of countries I may consider a universal plug adapter, but the dedicated plugs are so cheap, light, compact and expendable that I don’t see any reason to purchase a bulky universal adapter.
Earbuds
OEM Apple earbuds. Hard to lose, cheap to replace, but useless on flights. Bulky headphones are out of the question, but I’m eyeing these noise-blocking earbuds: Bose QuietComfort 20i. I’m not ready to drop a few hundred bucks on earbuds, but if I decide to care about audio and noise cancellation, these will be first on my wishlist.
Backup Drive
Seagate 2TB Slim External Hard Drive. I back up my photos daily for a total of three copies: originals on my CompactFlash cards, imported DNGs on my laptop, and DNG copies on my the backup drive.
In case my backpack is stolen, I keep backup devices in at least two locations. In transit, I keep CF cards in my pocket and the backup drive in my backpack. Since rear-end collisions are common, I recommend storing your gear in the rear passenger seat instead of the trunk.
Car Charger
Anker Dual USB car charger. As a digital nomad, it seems impossible to live without a smartphone — maps, bookings, offline translations — so a dead phone triggers my panic button. Never cheap out on chargers: a poor converter will damage your pricey equipment.
Update: I’m testing out a (much) smaller dual charger with great reviews: RAVPower 24W 4.8A Dual USB Car Adapter. Wirecutter tested the previous generation, but the latest is even tinier. I’m trying it myself!
Photography Gear
Camera Body
Canon 5D Mark III. Someday I’ll probably switch to a mirrorless like the Sony a7 III, but till then I’ll be shooting on my faithful 5D.
Camera Lens
Canon 16–35mm f/4 L lens with hood. I used the 24–105mm for the last 5 years, but it will stay at home now since I only travel with one lens.
Memory Cards
Lexar 1066x CompactFlash cards. Your memory cards need to be rock-solid reliable after thousands of miles traveled and dollars spent. And with Magic Lantern, these cards are fast enough to shoot gorgeous RAW footage. Still, I’m looking forward to a mirrorless camera so I can just use cheaper SD cards.
Card Reader
Lexar CompactFlash card reader. Cheap readers can corrupt CF cards, so it’s worth spending a few extra dollars for a reputable one.
Camera Battery
1 extra battery. The 5D’s impressive battery life usually lasts a couple days, but more than once I’ve forgotten to charge it.
CPL Filter
B+W CPL filter. I have the previous generation, but B+W recently released an upgraded polarizer that cuts out less light and is cheaper.
ND Filter
B+W 6-stop ND filter. I own a 10-stop filter as well, but since it’s rarely called for I have stopped packing it altogether.
Tripod
Sirui T-2205X Carbon Fiber Tripod. Easily fits in my carry-on backpack. I’ve been through three tripods, and this one strikes the perfect balance between stability and ultralight portability. And the twist locks are fantastic!
Ball Head
Really Right Stuff BH-30 Ball Head. This is my favorite gear upgrade of the last year: it’s an Arca-style, rock solid, lightweight ball head that is a delight to use and trivial to pack. Many photographers prefer the clamp version, but I love the knob version: it’s easy to twist even with gloves on, it shaves another ounce off the weight and is unbelievably compact.
Camera Straps
Peak Design Leash camera straps. After hating on some cheap shoulder straps, I’m in love with Peak Design’s straps. The ultralight Leash straps strike the perfect balance for comfort, style, and nomad friendliness.
Microfiber Cloths
Two microfiber cloths. Just steal them from an Apple fanboy.
Gloves
Vallerret fingerless merino wool gloves. Fingers are the first thing to freeze in landscape photography, so I consider these part of my photography kit.
Toiletries
The trick to ultralight packing isn’t to make everything smaller, but to figure out what you don’t need to bring in the first place! So nowadays I travel with almost no toiletries — I only carry what I couldn’t live without. Maybe it sounds anti-climatic, but disposable goods are the easiest to pick up and the most irritating to transport.
No special brands here, it’s all disposable anyway. At all costs, avoid lots of little plastic bottles — if it can go in a plastic bag, do it:
- 1 regular (full size) deodorant. Don’t bother with a travel-size deodorant. Go with an antiperspirant if you can: it’s lighter and will last for a few days. Look for one that specifically advertises it won’t leave stains — it will eventually, but the buildup will take a week instead of hours and save your merino wool shirts from unnecessary washes.
- 1 regular toothbrush. Nope, it’s not even the cute fold-up one from Walmart’s travel section.
- 2 itty bitty toothpaste tubes. Why can’t they make a toothpaste tube that’s 3 oz?
- TSA-friendly sick kit: some plastic bags with ibuprofen, loratadine and occasionally a homemade rice bag cover a host of minor ailments.
I do have one trick for the guys who want to maintain their hairstyle. Opt for a really thick hair wax or cement instead of gel, and the TSA won’t count it against your quota of liquids. For the last couple years, Layrite Cement Hair Clay has been my favorite. Not only does it take precious little wax to style, but you can scoop a palmful into a few makeup jars and be set for months at a time.
Whew, that’s everything!
Hopefully you learned a few tricks for your own ultralight packing list. Obviously this packing list is tailored specifically to my needs as a male digital nomad and landscape photographer.
With all this geekery comes an exhortation: never let unknowns — least of all, ideal packing — stop you from traveling. Don’t wait until you have the “perfect” packing setup before seeing the world, because you will never reach perfection. However, you will approach perfection much faster through practice and journaling what worked well and what didn’t.
So pack your bag and go see the world!
]]>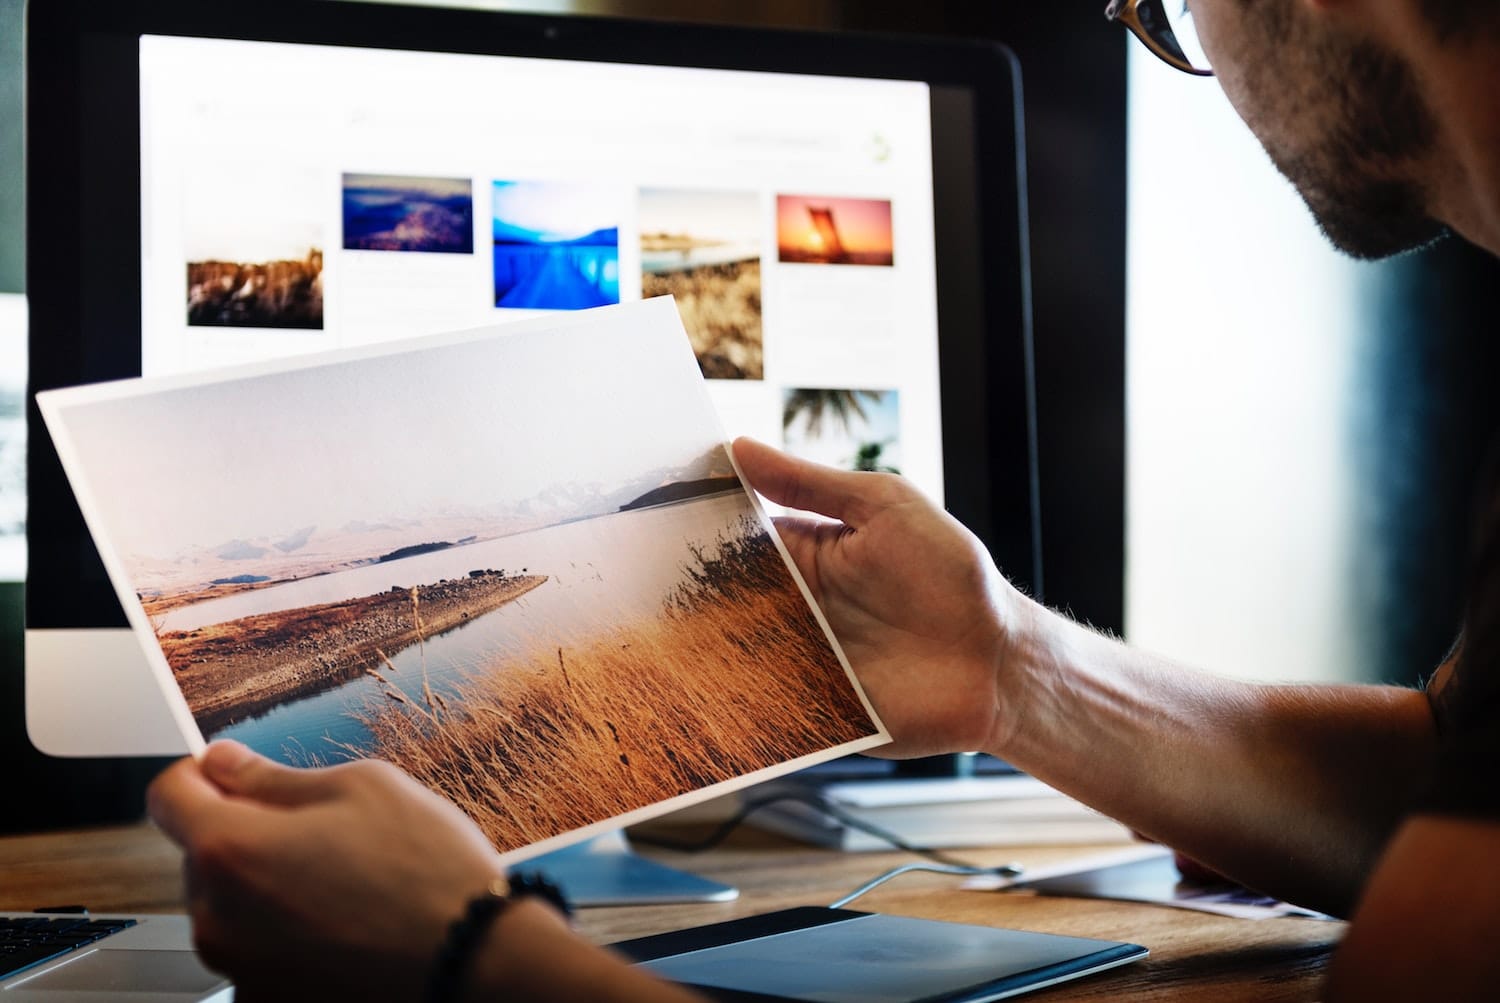
As a fine art landscape photographer, I occasionally get to crunch out some prints. The first time I worked with a lab, my batch of photos all came out too dark and yellow. Why? Because I was editing on a screen that was too cool and bright.
That’s a pretty common result of going to print with an uncalibrated monitor.
By the next batch, I had borrowed a Spyder sensor from work and calibrated my monitor, tweaked the photos a bit, and sent them off to the lab. The photos still came out a bit dark and inky, but the color temperature was spot on.
Fast forward to my first metal print. I painstakingly tweaked a 10,800 by 7,200 pixel shot of Italy’s Sella Towers on my calibrated monitor to send to a prestigious lab in North Carolina. A few days later I received the proof: not even close. I followed up and described the issues. A week later I received the reproof: still off.
Four proofs later, I got the final 36 by 24 inch print. Stunning, and still a bit different from the screen version. When you are producing one-of-a-kind fine art prints, four proofs isn’t unusual. For commercial wedding work? You’d be exceptional to order a proof at all.
Calibrating with the SpyderX Elite
A few weeks ago, the awesome folks at DataColor reached out and asked if I’d like to take the new SpyderX Elite for a spin. It’s been a couple years since working with a lab, but now that I’m working from a newer MacBook, it seemed about time to recalibrate.
The calibration process was uneventful — it took 10 minutes from opening the box till my screen was calibrated, and the actual calibration process took 60 seconds. Since the older Spyders, the software has gotten much less clunky and more Mac-ish. As before, my screen was calibrated a little warmer, pinker and less contrasty: Apple’s displays are well calibrated from the factory, but always tend to be overly blue and green and crush shadows.
And now that I’m calibrated, I have to be honest: I’ll probably never pull this sensor out again. That is, not until I upgrade to a new laptop. The Spyder’s strength highlights just how niche monitor calibration tends to be, especially for digital freelancers like myself.
Would I have purchased the Spyder otherwise? Probably not, but not because the Spyder doesn’t do its job well: it does its job too well, and I’m simply not the target user.
I am a digital nomad and fine art landscape photographer. I travel ultralight and educate traveling photographers on how to leave gear behind. These photographers rarely work with a lab, and when they do it’s to produce fine art prints — where no amount of monitor calibration will replace proofing, though it might help a bit with the first proof.
Downsides to Monitor Calibration
Yes, really. Ironically, editing with a calibrated monitor has caused issues for my primary viewers: my digital audience. Most of my readers and watchers tend to own Macs and iOS devices, and Apple displays are pretty consistent with each other. Yes, they run cool and green, but consistently and not by much. So I actually prefer to edit with the built-in color profile active. Otherwise, photos edited with the calibrated profile always look dull to my iPhone and MacBook crowd.
Who Should Calibrate Their Monitor?
So if — as a photographer — I’m not a good target user, who is? I’ve found color calibration to be essential in a few scenarios:
- You frequently print for commercial clients.
- Your digital audience has a large non-iOS/Mac crowd.
- Your monitor is substantially off.
- You have side-by-side external displays that need to match.
- You need to sync color profiles across monitors in an office, such as a studio.
If any of these describe you, I’ll bet you already have a Spyder sensor at the office. If not, you can grab one here.
It turns out that, as a nomad, I am none of these. I primarily edit and deliver to digital, occasionally doing a metal print which, in the past, didn’t benefit from a calibrated monitor.
Color calibration is the sort of thing I expect teams to use for collaboration, but probably not freelancers. In contrast, when working with the video production team at church, I see a strong use case for calibrating all monitors and laptops.
Should You Buy a Sensor?
The SpyderX Elite is a fantastic calibration sensor. The question is, do you need to calibrate your monitor at all? I will probably calibrate any laptop I own once or twice in its lifetime. Even then, I’ll likely proof with the built-in profile for the sake of my substantially Apple-loving audience.
So next time, I’ll probably rent a sensor instead of buying one which will end up in storage the next time I hit the road.
]]>
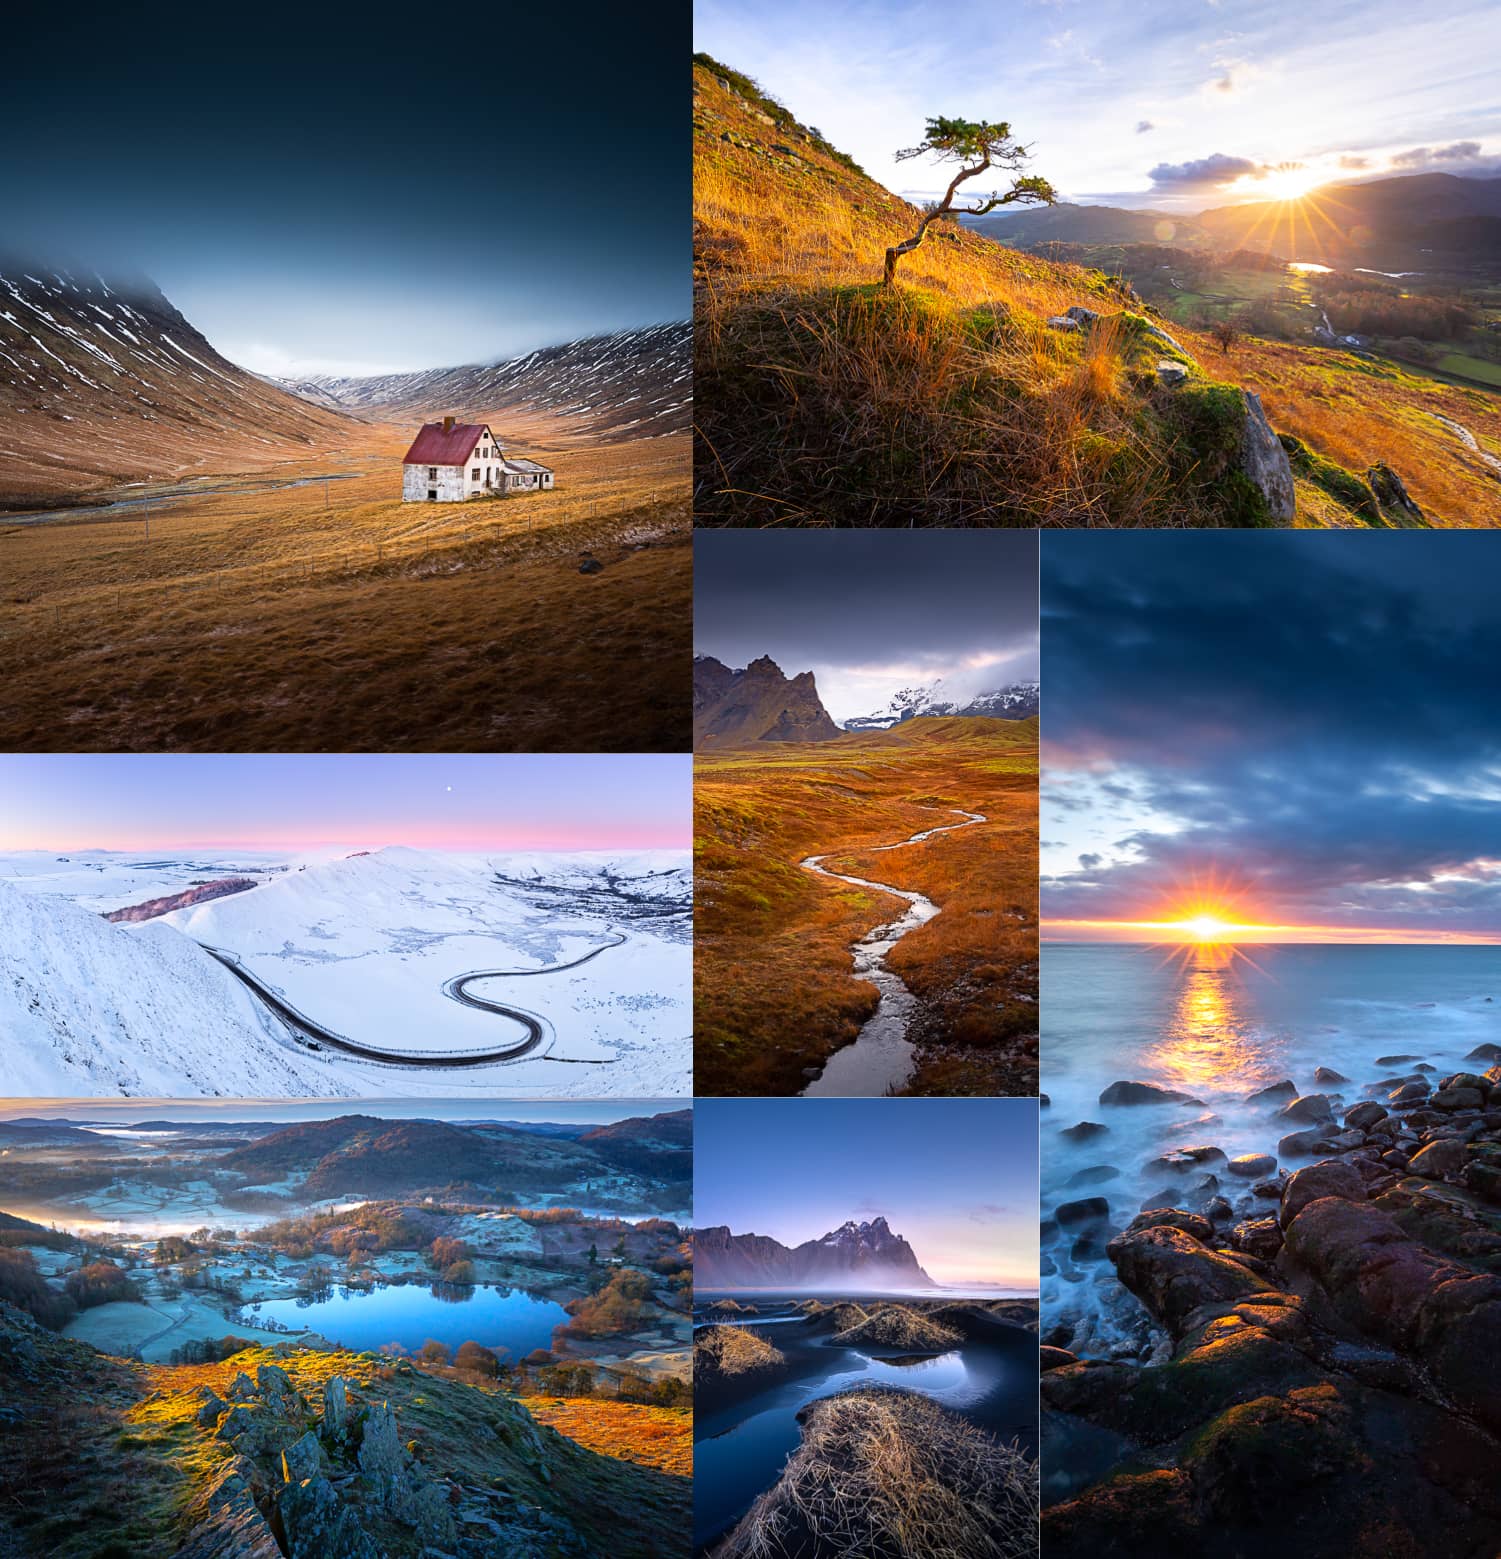
It’s hard to believe it’s been 4 months since taking off for Iceland. The last 16 weeks have completely challenged my preconceptions of what long-term travel would be like.
Despite the amount of time, there are plenty of new locations I scouted, but couldn’t shoot in the right conditions. If you feel like you’ll ever run out of material for stunning landscape photography, I promise: you won’t.
Before starting this trip of a lifetime, I wrote about preparing for a sabbatical and the importance of outlining key results. It’s not a vacation, but a strategic investment in your life and photography.
So what do you do when you’ve accomplished most of your sabbatical goals? “I want to expand my photography portfolio” isn’t enough anymore, because it leads to just that: an expanded portfolio. Nothing more.
A few days ago I flew back to the USA to recharge, reevaluate and celebrate everything that’s happened in four months on the road. What’s next? I don’t know. I have countless stunning countries on my bucket list, but no goals to accompany them. No challenge to rise to the next level. I don’t work well that way.
Ironically, you can get stuck in a comfort zone when you’re constantly on the road. In the pursuit to never stop growing, sometimes leaving your comfort zone means taking an exit. And that’s okay!
For the same reason people hesitate to take a sabbatical seriously, it can be intimidating to take a break: what our peers think. Some folks think I am on a perpetual vacation, and can’t fathom how I could need a break from travel. As many digital nomads will tell you, long-term travel completely changes you, and once that change is effected, things won’t be the same when you return. Things never “go back to normal,” because travel molds your outlook. Consequently, it shapes your future.
That’s why I believe in the value of traveling now, not later: it has the capacity to enrich your future. I don’t know what’s next for me, but I can list 30 things that will be different from before. You never “settle down” from travel, you simply move on to the next season.
That means when you need a break — not if, but when — take it. Take time to reevaluate what’s next in light of your experience.
“If you can change your mind, you can change your life.”
—William James
In Exeter, I jogged to the nearby IKEA. My favorite part of IKEA’s approach to interiors isn’t so much the cute accessories or some-assembly-required shelves: it’s their willingness to depart from conventions. Why do you need a breakfast table? So what if the bed is in the kitchen?
At the heart of design and creativity is a healthy disregard for convention. At the heart of turning dreams into achievable reality is a healthy disregard for convention… and what others think.
I wouldn’t trade these last 4 months for anything, because I gained much more than beautiful photos. I brought back what you can’t put a price on: perspective and a changed mind. That’s a worthwhile investment, no matter what’s next.
What conventions are you holding onto that are handicapping your goals?
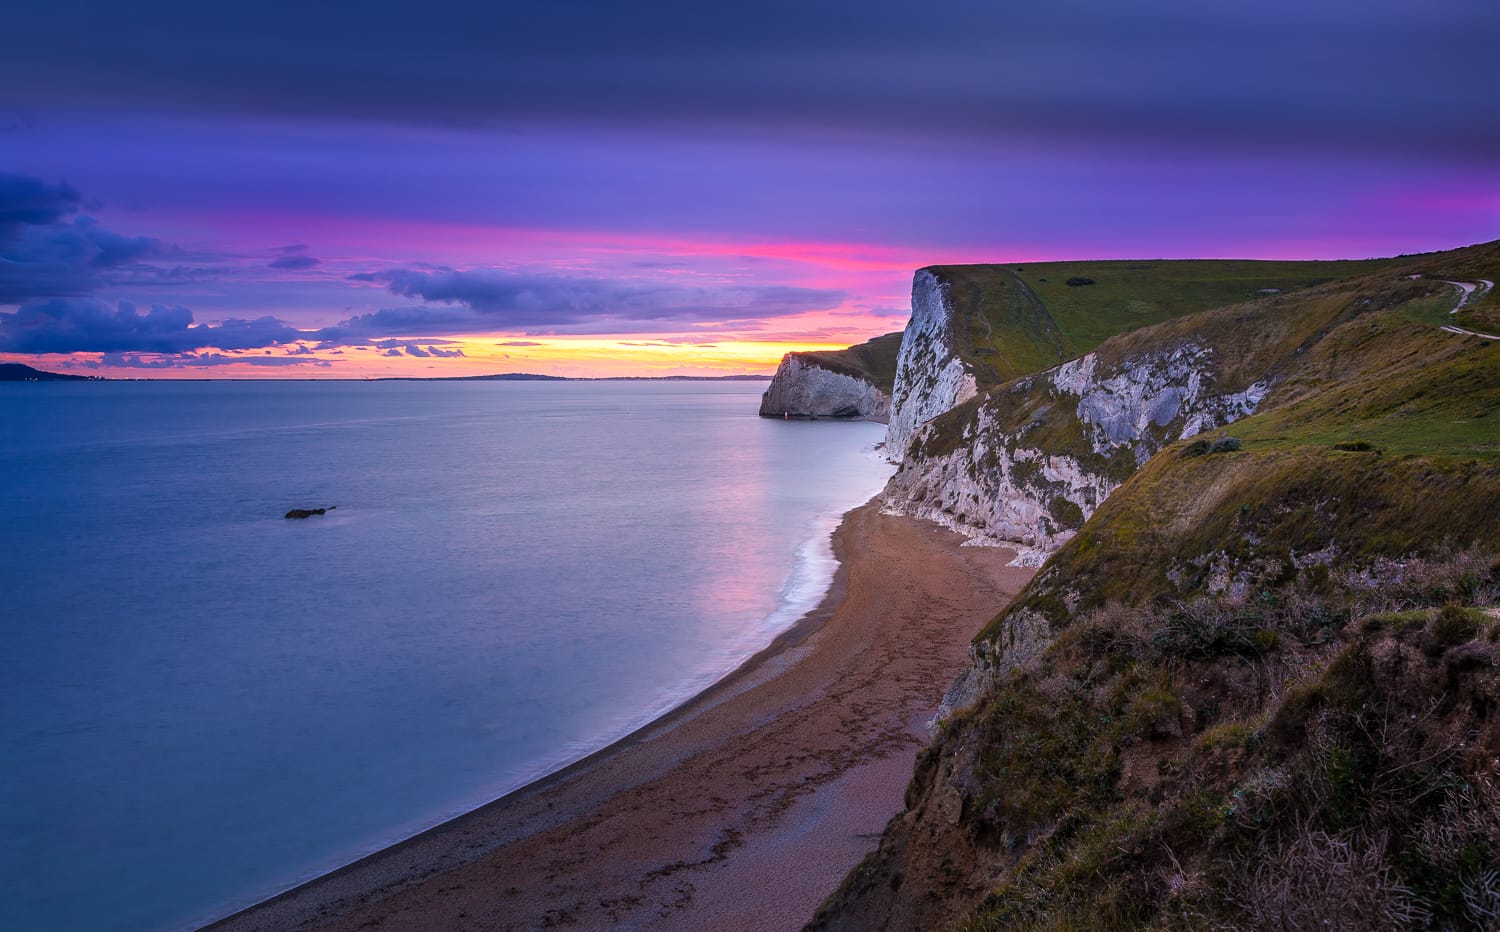
This morning, I skipped my B&B’s amazing breakfast for an early dawn shoot on the Jurassic Coast. I drove and walked about an hour to get set up for a composition I picked out yesterday, and waited.
A few minutes before sunrise, I realized I wouldn’t care for the lighting that much. It was nice, but not that nice: the sky was too clear, and the pinks on the horizon were subdued. So I walked back to my car and just strolled down the beautiful pebble beach at Lulworth Cove.
I didn’t take my camera out of the bag once all morning.
A year ago, I would have beat myself up and felt lousy all morning for dedicating effort to a dawn shoot and bringing back zero shots. But this morning, I actually really enjoyed myself: I felt content and peaceful as I soaked in the sunrise and listened to the waves.
The difference between this year and the last is understanding the Sunk Cost Fallacy: when time, money or effort is irrevocably spent, it should have no bearing on our next decision. So what if I gave up breakfast and a few hours to get here? I can’t get them back, but I can stop sinking more time and effort into it by moving on.
Which brings the most value right now: continuing to shoot subpar photos because of the things I gave up to get here, or enjoying a walk on a pebble beach?
I hope it’s a sign I’m maturing as a landscape photographer: that knowing when to quit and being able to enjoy the rest of the day means I no longer feel that a successful image is determined by a roll of the die.
What past investments have locked you into a mediocre path at the expense of a better avenue? Every minute is a clean slate, so what will you stop sinking your time, money and effort into?
]]>
How can you bring a “flat” image back to life? We just wrapped up a two-part vlog series on light painting: a powerful way to guide your viewer’s eye to the important elements in a landscape.
Despite our best efforts to shoot at dramatic times of day, a raw photo often comes out looking dull, and global adjustments like exposure, contrast and color temperature won’t fix the issue.
To recover drama in an image, you can imitate the principles of light painting in post production. We’ll walk through 5 steps you can take to light paint an image:
- Identify the composition, shapes and lighting in the scene.
- Darken and cool the entire image, especially unimportant regions.
- Paint in global adjustments, then work your way to regional adjustments.
- Identify the natural direction and shape of light.
- Paint in some smaller details on the subjects you identified.
5 Alternatives to Dodging
Dodging — e.g. bumping exposure — isn’t the only way to draw attention to a subject. In fact, it is often my least favorite technique because it tends to scrunch together tonal details and crush dynamic range.
Here are 5 alternatives to dodging that will help bring a photo to life with light painting.
Light painting can be accomplished several ways, all with the same purpose of attracting attention to the primary regions of interest. Instead of being limited to exposure, you can use a combination of white balance, saturation, shadows, contrast and whites to draw interest to a region, or downplay unimportant areas by applying the reverse effect.
I find myself using light painting to the most success in images that are already exceptional straight out of the camera, but by mastering light painting in extreme situations, you’ll be better equipped to apply it gingerly to your portfolio images.
Make sure to subscribe to the Yellowscale YouTube channel for the latest digital nomad tips, landscape photography tutorials and on-location travel vlogs!
]]>
I’m done being a digital nomad. Despite my attempts to convince others that the minimalist mindset frees you to do outlandish things like taking a travel sabbatical, I failed to convince myself.
So rather than continue to mislead you, let me come clean and save you from the eerie silence my empty apartment makes when the AC turns off. In truth, I planned to sit down and write this confession sooner… but I don’t actually have anywhere to sit. 🤷♂️
- I’m tired of being asked “is your house always clean?” because I don’t even have a house.
- Can I please… stop… decluttering… and fretting over every single thing I own now that I have 17 possessions.
- I’m tired of having nothing to clean, because I’m never using the same floor or kitchen sink long enough to make it dirty.
- I’m tired of feeling like such an idiot when I see my friends with a real adult life. Kids, attics, house, cars, television and a Netflix account.
- I’m tired of people thinking I’m insane because I own next to nothing, don’t have a house or car, and have no debts. Thanks for ruining my life, Dave Ramsey.
- I’m tired of not being allowed to use the #adulting hashtag since everyone thinks I’m lazy for not washing dishes I don’t have.
- I’m tired of having no gym membership because I already get so… many… steps… from all this hiking. The world is my treadmill.
- I’m tired of being hungry all the time. Oh wait, I’ve got a box of Clif bars here in the back seat…
- I’m tired of missing coupons for Chick-fil-A because I don’t have a mailbox. Come to think of it, I can’t find a Chick-fil-A in Iceland.
- I can’t finish the tenth reason because I’m tired of sitting on this tree stump with a view of Mt. Hood.
I could probably address most of these issues with a trip to T.J.Maxx, but that would require a car.
As a digital nomad, I embrace the minimalist mindset — it frees you to pursue opportunities without regrets or obligations to tie you down. If you’re looking for more substance and less satire, here’s how you can start the journey of becoming a digital nomad today.
]]>
What if you could travel the world for a year, investing in your landscape photography as you go? It may be much more realistic than you think!
I’ve been adopting the digital nomad lifestyle for several years, but hadn’t yet made the jump to traveling full-time. Being a digital nomad isn’t just about being on the road all the time: it’s a lifestyle that frees you to pursue opportunities with no regrets or obligations to hold you back.
After a few years of adopting the minimalist mindset, honing my travel setup and eliminating barriers, and finally I’m ready to hit the road! I’m kicking off a landscape photography travel sabbatical for 6 to 12 months. I’ll continue writing about travel, minimalism and landscape photography, plus I’m vlogging on location, so make sure to subscribe.
But how could you get to the point of a travel sabbatical? Don’t expect to snap your fingers and hop on a plane tomorrow — but you should start getting ready today, not tomorrow to position yourself for the trip of a lifetime!
First, ask yourself these questions to evaluate a sabbatical:
- Why do you want to take this sabbatical? You need to convince yourself it’s worth it before you’ll convince anyone else.
- What would a “successful” sabbatical look like? Do you expect to grow your photography portfolio or foster new income sources?
- What are you giving up? Full-time salary, comforts and securities — a sabbatical has a cost beyond your job, so count the cost and decide if you’re still willing.
- What obstacles do you need to start removing now? Debts, possessions or cognitive biases? Time will be your strongest ally, so tabulate these obstacles and begin conquering a few each week.
Check out the full the write-up on evaluating a travel sabbatical to make it the best investment of your life.
Hold true to your purpose
You will probably bump into some passive aggressive hints when you mention a travel sabbatical to colleagues, friends and family, so make sure you are convinced yourself, and take counsel from those who have demonstrated their commitment to your well-being in the past. Then hold true — no matter what.
I hope that encourages you to take an active role in your next trip of a lifetime, make sure to subscribe to the channel to keep up with the adventures, latest digital nomad tips and landscape photography tutorials!
]]>
What makes a landscape image believable? In case you missed it, we just wrapped up a two-part vlog series on neutral tones. Neutral tones are desaturated subjects the viewer expects to be grayscale, like clouds, fog, water, snow and architecture.
Once you’ve identified the sources of neutrals, you can take an impressive amount of creative liberty with your landscapes. There are two opposing strategies you can apply:
- Carefully avoid altering the neutral tones, but freely correct and enhance vibrant colors throughout the image.
- Intentionally alter the neutral tones to convey weather, temperature and time of day while leaving the rest of the color palette alone.
In both strategies, the neutral tones serve to anchor the rest of the color palette.
1. Avoid altering the neutral tones
While the vibrant colors in a sunset can be pushed far past their natural saturation before the image falls apart, it takes little adjustment to a neutral tone before the image becomes jarring. That’s because we have preconceptions of how neutral tones should appear, so even the slightest change has incredible influence over the mood of the scene.
Conversely, an image without neutral tones at all may look fake or unbalanced.
2. Intentionally alter neutral tones
In direct opposition, you can alter neutral tones to convey environmental factors without disturbing the beautiful color palette throughout the rest of the image. A tiny change to only neutral tones will introduce an exponential amount of mood into your image that no amount of saturation or contrast could otherwise infuse!
In particular, altering only the neutral tones helps convey environmental factors like the weather, temperature and time of day.
Make sure to check out the full write-up on Digital Photography School for more ways to leverage neutral tones in your photography. Don’t forget to subscribe to the Yellowscale YouTube channel to keep up with new digital nomad, travel and landscape photography tips!
]]>
When it comes to possessions and mindset, I’m a solid minimalist. I acquire with intentionality, and am twice as fast to un-acquire stuff the moment it no longer brings exceptional value.
But in one area, I’m a hopeless clutter addict: my digital life.
After a decade of computers, I’ve acquired terabytes of digital clutter. Since storage is cheap, I initially embraced a gospel of “delete nothing.”
In trying to coax family and friends into more minimalistic habits, I encouraged them to digitize everything so they could trade physical possessions for cheap digital storage.
What are a few backup hard drives to a garage full of unsearchable memories?
One is greater than four
That philosophy hasn’t worked well the last few years as I’ve consolidated 2TB onto a 0.5TB laptop — and in keeping with the principle of accessibility, I have no plans to carry around external drives with the other 1.5TB.
Now I realize storage isn’t the problem. Ownership and availability are. Just like physical possessions, every file I own has mental ownership of me. And while the practical aspect — running out of space on three computers and selling two of them — has forced my hand, it’s been on my mind the last few years. As I aim for accessibility and replaceability, I can’t seem to get my digital life in shape.
If your laptop (and backups) burned up, what would you lose? Would you have anxiety from not knowing the extent of the loss? If I’m preparing to lose or let go of things, I want to have a say in what goes while I have opportunity.
Going through the digital closet
That means letting go of files in exactly the same way I cull through possessions.
When decluttering a room, the easiest place to start is your wardrobe — styles go out of style, and you can only wear one outfit at a time. In the digital realm, that meant a visit to my downloads and design asset folders that were littered with:
- Photoshop brushes, actions and textures that I never even unzipped.
- More themes, icons and templates than I care to admit. Did I mention I used to collect Windows Vista icon packs?
- Design work that’s over a decade old and I will never, ever want to look at again.
1. When was the last time I used this?
Maybe your digital life isn’t as hopeless as mine, but why on earth would I hold on to unzipped fonts and icons I downloaded 5 years ago?
To start my spring cleaning, I sorted by Date Modified or Last Opened to guesstimate the last time I wandered in the neighborhood.
2. Will I need this in an emergency?
Why are these files in a folder where I’ll never find them? Emergency documents should be accessible and replaceable, which means they should be available online and backed up with 1Password or Dropbox.
3. Does this bring some happiness?
If you don’t use it and you don’t need it, it isn’t bringing happiness. Trash it.
4. Is there already something better that duplicates its purpose?
The downloads folder is a well-meaning sanctuary for duplicates. Bench Report.xlsx, Bench Report (2).xlsx, Bench Report OLD.xlsx. For every file you download, find two that should be trashed or moved to a better home. Need to archive a document for records? Convert to PDF and ditch the source document.
Two hours later, my downloads and design asset folders are completely empty for the first time in 6 years. In sifting through thousands of files, I found 10 that were meaningful and belonged elsewhere.
Letting go of digital junk
Before dropping from 2TB to 1TB, I had already taken practical steps to remove large files. That was easy: I just looked for old raw video files.
But going from 1TB to 0.5TB was infinitely harder because I needed to let the millions of little files go. Large files may weigh my hard drive down, but the millions of little ones weigh me down with anxiety.
Since becoming a digital nomad, I thought I’d gotten over I-might-need-this syndrome. However, my old design work and downloads folder were full of memories, and I liked the security of having something to reminisce over.
It’s the same trap I thought I had tackled years ago. It suggests two unrealistic assumptions:
- That these files are something I’ll want to reminisce over.
- That preserving all of these files in their original format is the best medium to reminisce.
Scrapbooking
Some of my friends love to scrapbook. For a while, I thought it was stupid — actually, I still do — but scrapbooking can be a powerful antidote to clutter: it coaxes you to curate hundreds of isolated memories into a cohesive highlights reel.
An image has far more power in a gallery collection than as a single in the closet. Scrapbooking creates from material you’ve already captured. Few things have intrinsic worth: it’s what we invest that takes raw material — family photos or old design work — and turns them into something valuable.
Scrapbooking preserves memories in a format worth celebrating. It’s not the material itself, but how you frame it.
Digital scrapbooking for rainy days
In the digital world, that entails recycling old material — photos, milestones, projects — into a sort of “digital scrapbook.” While the source material might be thrown out, the scrapbook is worth holding on to for reminiscing.
A digital scrapbook can be just about anything: producing a performance highlight from work emails, coalescing old video clips into a YouTube montage, or uploading interior design ideas to a moodboard like Niice.
When a “rainy day” hits and you’re in need of encouragement, you won’t reach for reams of raw, disorganized memories. You will want to reach for a concise, meaningful digital scrapbook.
However, if you frequently find yourself with rainy days and reminiscing over old memories, it might be time to get out of your comfort zone to make new memories. Being comfortable is one of the dreariest, most uncomfortable stages of aging.
Rather than stockpiling old memories for depressing days, optimize your lifestyle for making new memories over curating the old.
Down to 400GB
I was a hopeless digital clutter addict. But there just might be hope.
I made one final backup and set up camp on a new 512GB computer. Whether I’m away from backups for a few days or a few years, now I know that I have everything I need with me.
Like moving out of a house, moving to a new computer gets easier each time. You get in the habit of knowing exactly what you will let go of, and what carries meaning. Minimalism is about making everything count: anything that doesn’t, goes in the trash (folder).
Apart from a little baking soda, tidying up your hard drive is no different from tidying up the house.
]]>
Photography can be a compelling storytelling medium, but often mediocre storylines hide behind stunning colors and effects.
A few vlogs ago, we broke down three ingredients of effective landscape photography:
- Composition
- Shapes
- Lighting
By weaving these three elements together, we can reveal subjects spread throughout the image only as the viewer wanders through the landscape. After editing a shot for too long, it can be difficult to assess the image objectively — one way to reset your artistic senses is to edit the image upside down.
This week, we return to critiquing some images to break down why some images are effective at stalling the viewer’s interest. In particular, panoramas turn out to be a surprisingly difficult format to execute well and secure the viewer’s attention.
Whenever one element — composition, shapes or lighting — is missing, it’s difficult to compensate with the other two. Without enough subjects in the composition, there’s nothing for the shapes to connect, and even a perfect composition won’t mask flat lighting.
As you browse through your portfolio, use this critiquing process as an opportunity to turn photos that didn’t work out into learning material so that next time, you can be more intentional. To learn more about growing faster as a landscape photography, check out my vlog on conducting a photography retrospective.
Make sure to subscribe to the Yellowscale YouTube channel to keep up with new digital nomad tips and landscape photography tutorials!
]]>
Minimalism.
What is the first image that came to mind? A graphic design style? An interior? An empty, bleak, white-washed room?
Or did it make you think of a lifestyle?
A Tale of Two Houses
Like most of our friends and neighbors, my parents had a lot of stuff. Closets, attics, garages, kitchen cabinets… filled to the brim with things that we rarely used and hoped we wouldn’t need. That stuff provided a sense of security and comfort for my parents.
I’m a bit contrarian: all that unused, uncatalogued stuff gave me anxiety. Closed closet doors made me want to pour over their contents to dispel their hidden mysteries. We responded differently to having lots of stuff, but my family had one universal frustration: the things we did love were drowned out by what we didn’t.
When we entertained guests, we would spend a couple days cleaning, storing and tossing — but with a surplus of knick-knacks, we always had the inevitable temptation to display what we loved alongside mediocre pieces. It wasn’t that we lacked stunning pieces, but that they became diluted by less stunning items that we displayed for sheer need.
It was a bit like merging a fine art portfolio with Instagram selfies.
Last week, my brother Josh moved into his new place. I have to admit, for someone who professes to care little for stuff, I’m a little envious. He has a beautiful space to work from, and with his interior design skills he could turn the space into a gallery (and sell my fine art photography) or feature it on Houzz.
He owns very little. The space is huge and will remain empty for some time, but the few things he owns display a caliber of taste that fills up the space.
With Josh moved out, I resolved on my drive back to redouble my efforts to get rid of anything superfluous, especially larger furniture that would give me a moment’s hesitation. I felt inspired to clean things up a bit, only to find:
- Now that I have fewer things, it feels empty.
- The interior designer in me wants to turn my apartment into an art canvas.
- The bathroom screams for a makeover.
- I feel the need to fill the space up.
When a space is too empty, I feel a bit lonely. When I own too much stuff, I feel attached and anxious about it holding me down. The conflict that stirs within! What shall I do?
The Minimalist Ethos
“Surround yourself with (a few) things you love.”
—Me?
Minimalism doesn’t mean owning nothing. Minimalism is an ethos: it means having nothing superfluous, and often that means choosing a few quality things over quantity. Minimalism can be framed in the negative: “Remove everything that is superfluous.” But sometimes I find it a bit contrary to the purpose of minimalism. So I start from the positive: “Be intentional about what you add: only add what brings exceptional value.”
What do I love, and what things make me happier? I have a handful of exceptional things, some that could be considered superfluous:
- Accent lighting. As a photographer, light strongly affects my mood.
- Travel clothes, and some dressier winter wear that I probably wouldn’t travel with like a scarf and sweater from Ireland.
- A few succulents, like lavender and ferns, that remind of my favorite places in the world.
- Candles and soaps. Yes guys, roll your eyes — of the five senses, the sense of smell creates the strongest ties to memories and has the strongest recall. I have a candle that smells like the Scottish Highlands and a soap like ferns in the Pacific Northwest. But ironically, my strongest memory trigger to date is a deodorant I used (and hated) while traveling non-stop for three months.
- A few small but unique knick-knacks that carry dual value.
- A chair that reminds me of the Alps, and a smaller desk chair that reminds me of Norway.
A lot of these items would be considered superfluous: extra lighting, plants and other decor accents. But “superfluous” implies they bring no value, when in fact they bring exceptional value to me by making my space a place I enjoy living in — but without holding me down.
Every posession you own will have a chance to posess you. Minimalism asks you to be intentional about every item you introduce to your life. Everything has a cost, so make each one count.
]]>
Photographers often talk about leading the eye through an image, but what exactly does that mean? It usually includes the use of composition, shapes and lighting to encourage a viewer to rove the image in a fashion that tells a story.
The “beats” of a plot line don’t come all at once: they are spaced throughout the story to hold the viewer’s interest. And like any good story, the beats of a captivating landscape image aren’t condensed into one region of the photo.
Stories are hard to tell with a still image, but we can imitate a few key components of effective storytelling by slowly revealing new details and subtleties as the viewer dwells on it. It starts with composition, shapes and lighting: these aspects of an image tell a story and communicate a mood by:
- Maintaining the viewer’s interest
- Drawing attention to the important elements
- Helping the viewer skip past the unimportant regions
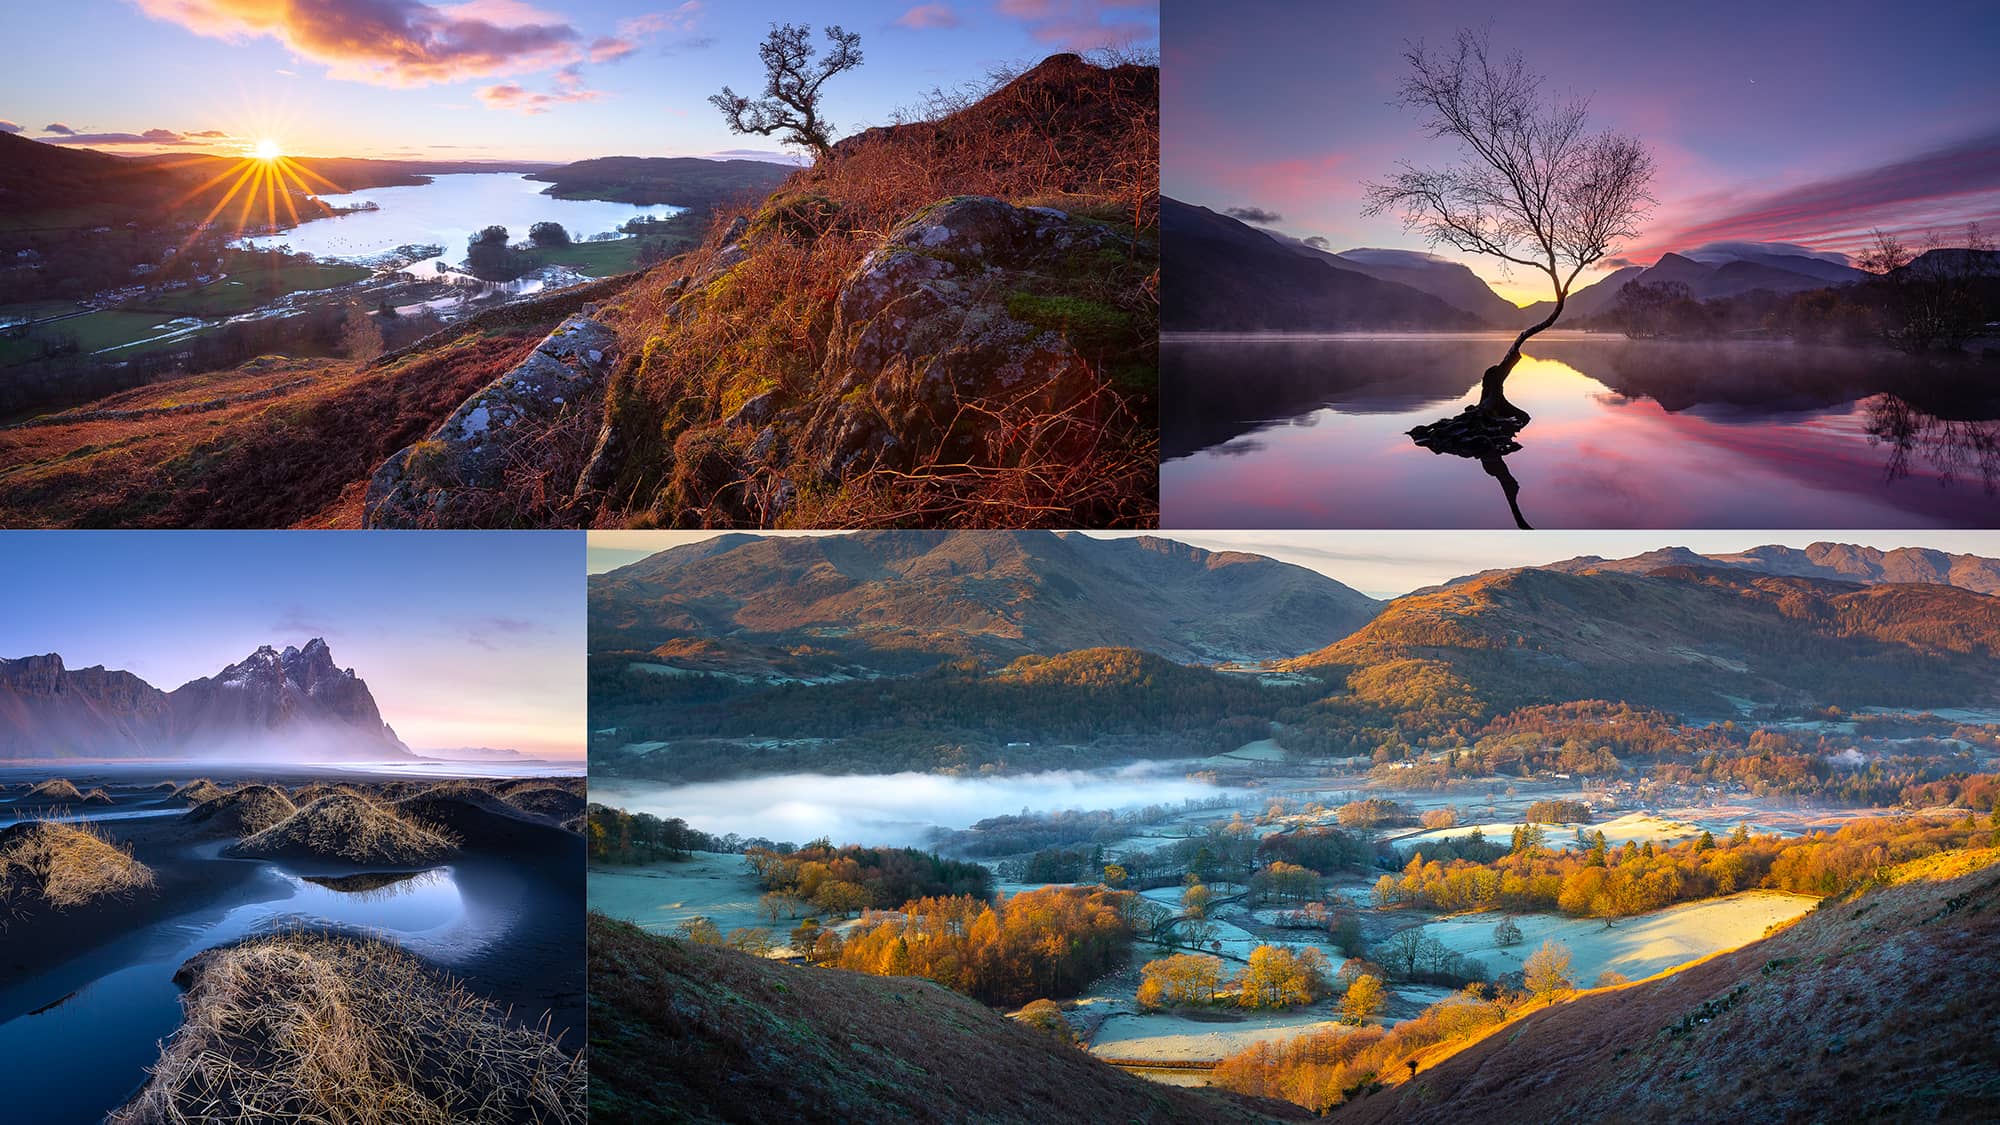
To drive home these three elements, I pulled five images from my portfolio and broke down why they do — or don’t — deliver on these three elements. Check out the vlog for the full critique, but here’s a quick peek at how I broke down these images.
Don’t forget to subscribe to the Yellowscale YouTube channel to keep up with new digital nomad, travel and landscape photography tips!
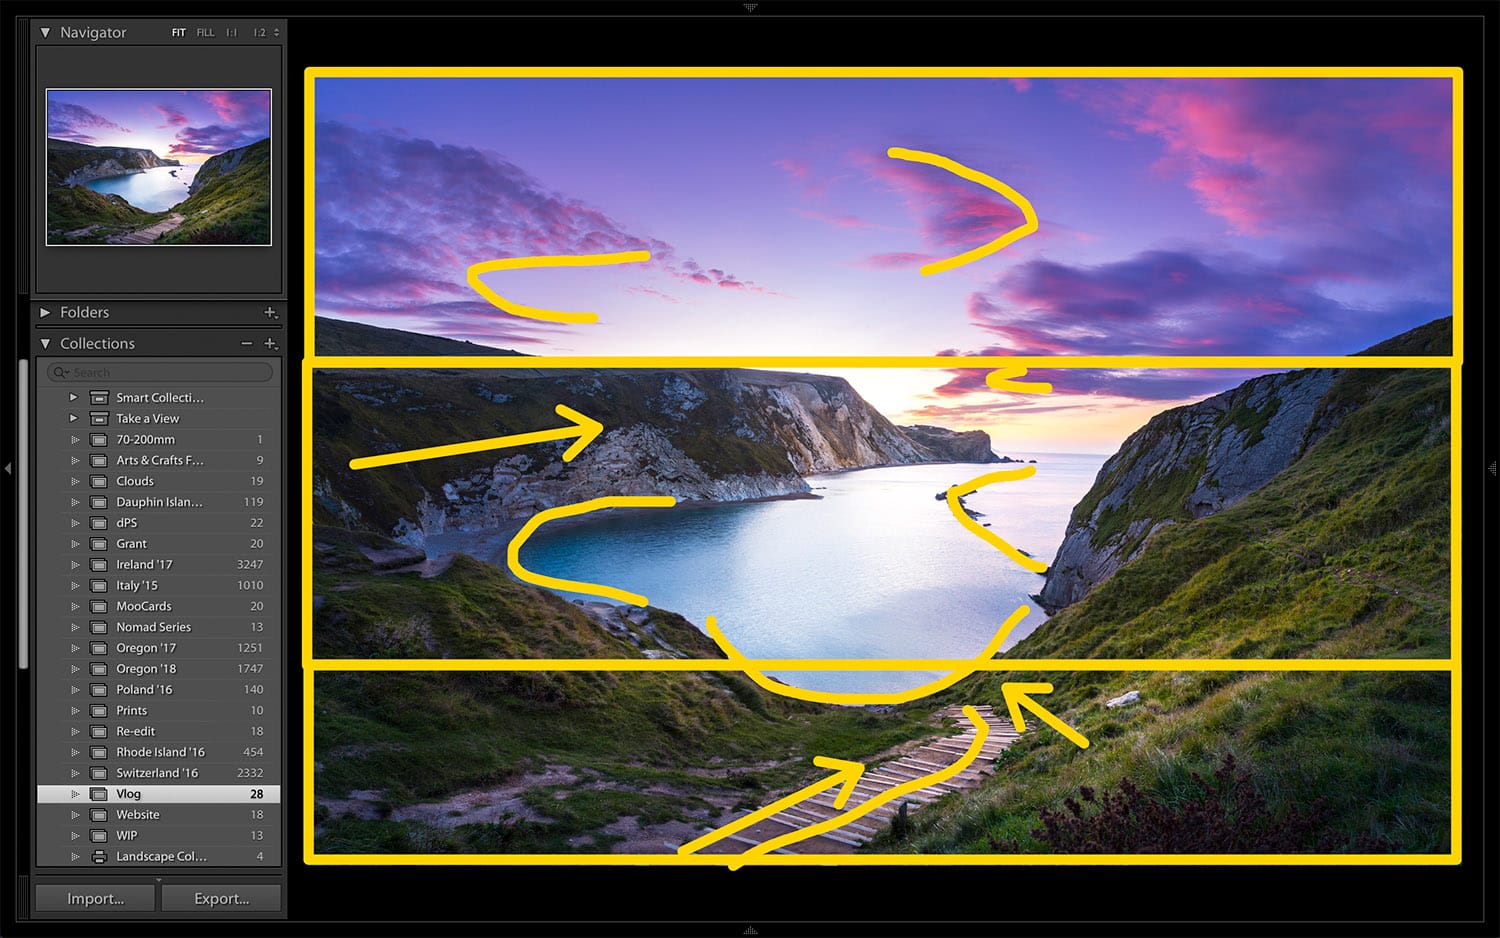
Man O’ War Bay (England)
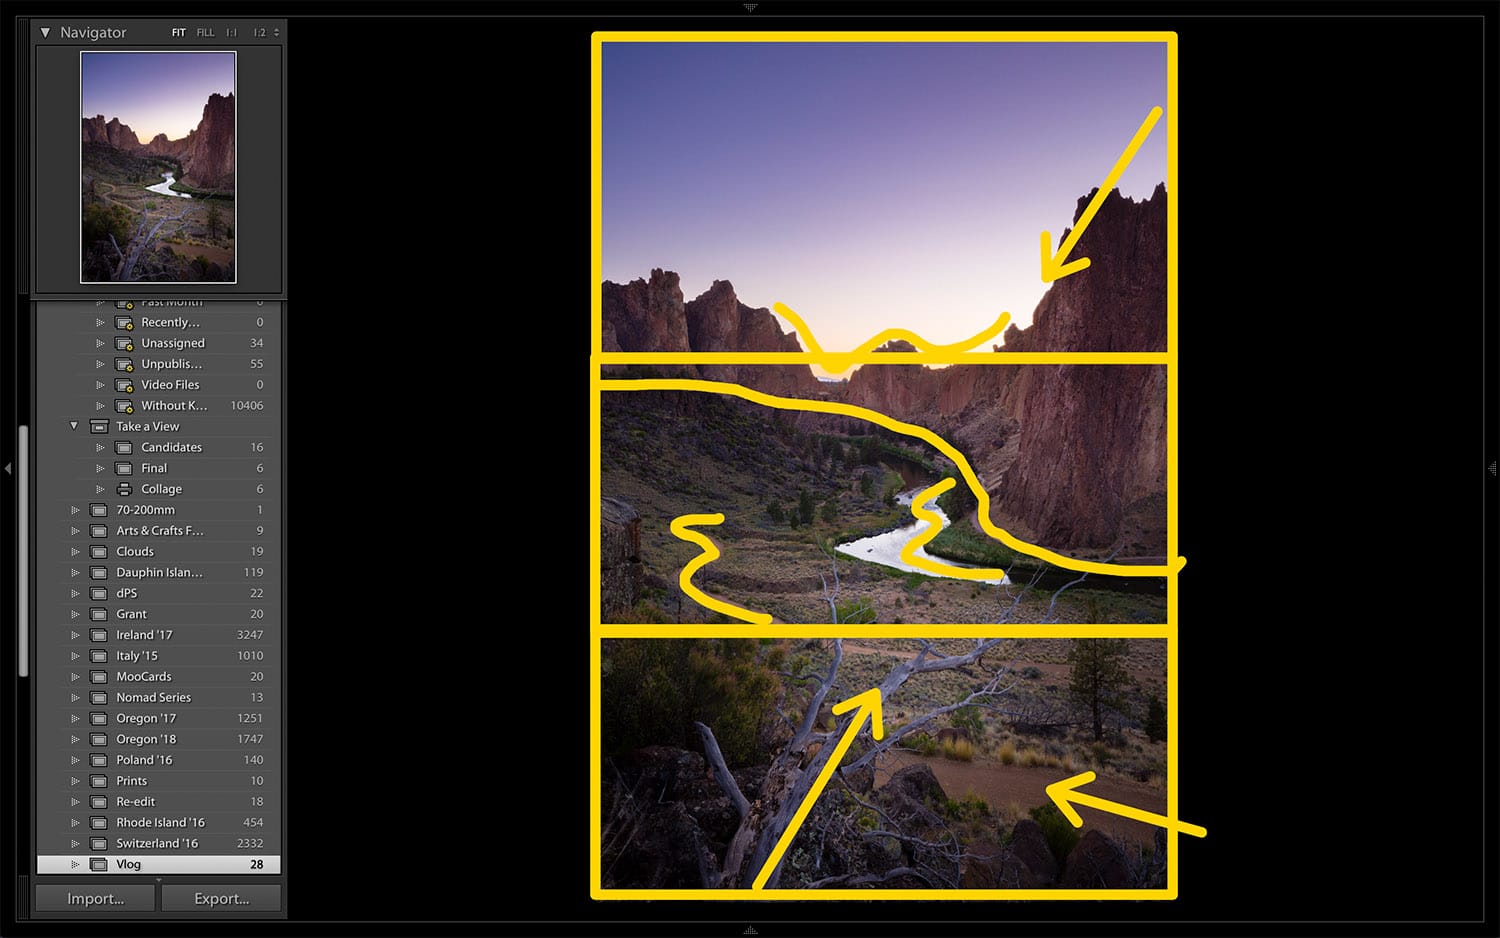
Smith Rock (Bend, Oregon)
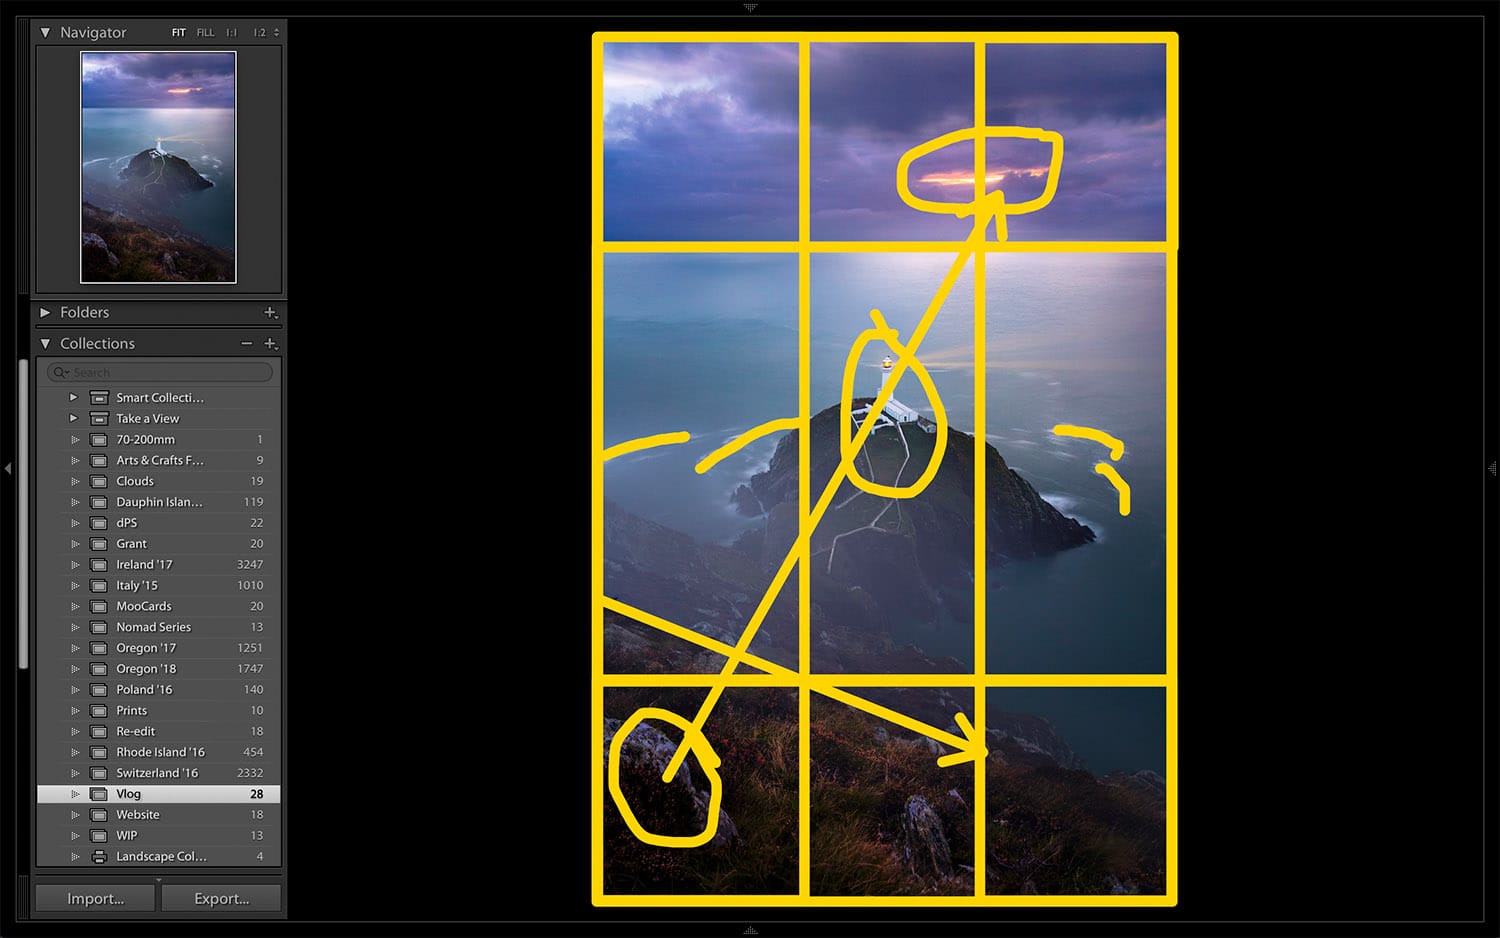
South Stack Lighthouse (Wales)
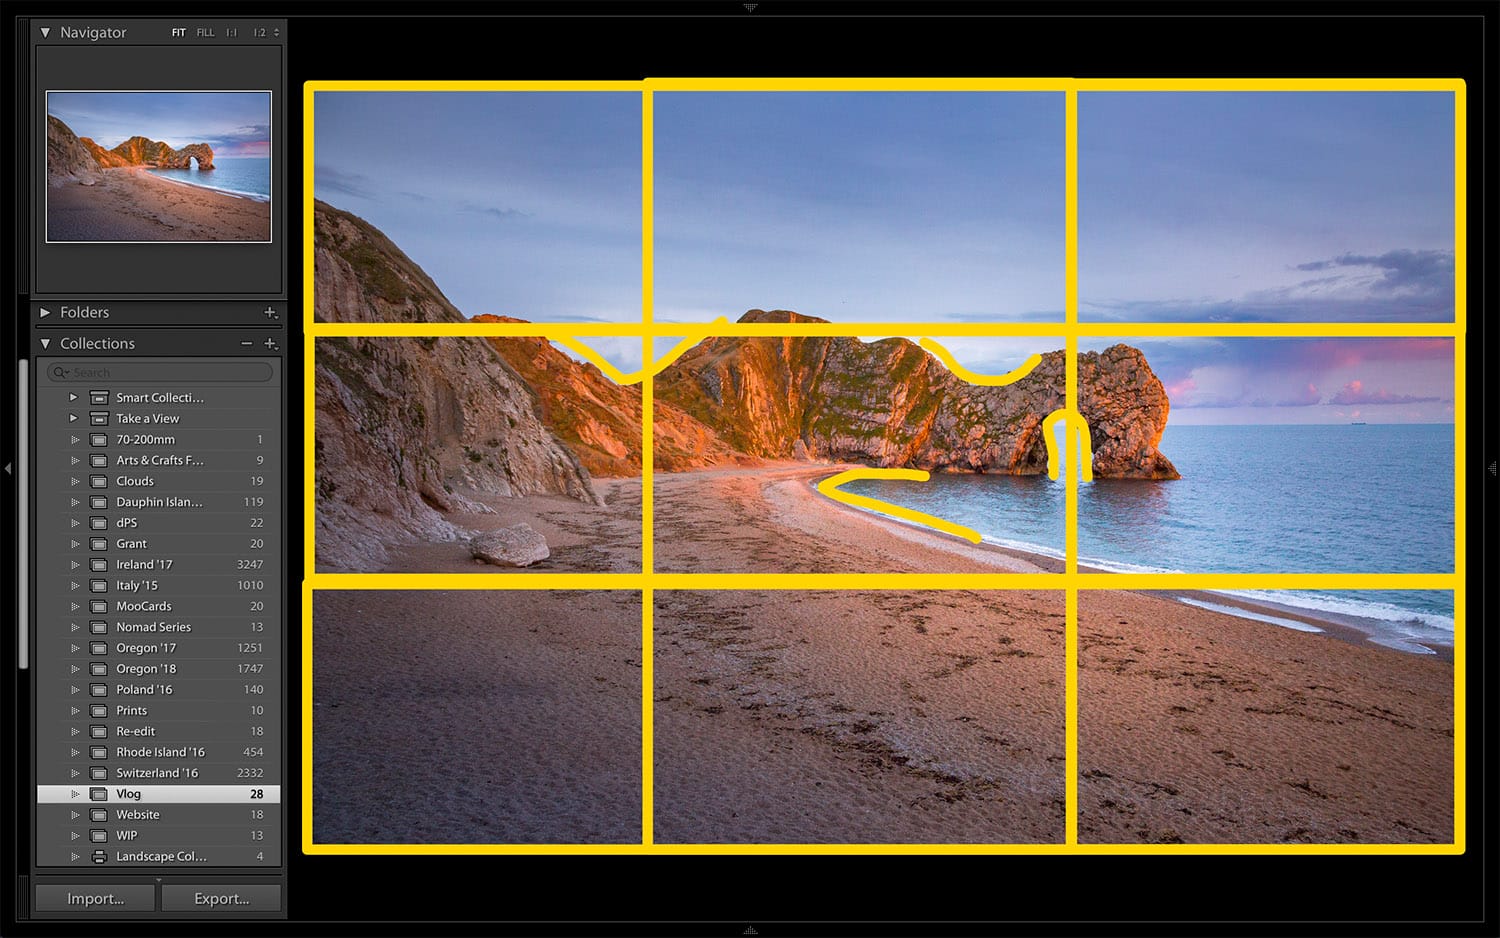
Durdle Door (England)
“Good enough” has never been a strong part of my vocabulary. Growing up, anything less than an A was unacceptable to me. In college, a 4.0 was mandatory. Those expectations paid off, but didn’t work so well after academia.
When I started full-time software development, that perfectionist tendency carried over. Every line of code was meticulously combed for bugs, or removed altogether during the sixth refactor. Caring about code quality is important, but at some point perfection becomes the enemy of useful: 20 near-perfect lines of code have no utility for our users until they’re shipped.
How do we balance craftsmanship with usefulness? In software development, the cure is to “iterate to perfection”: get your code to 80% quality, have a colleague review the code to get it to 90%, then ship it. Over time, make that code better so it approaches perfection in the long term while still providing utility to your users.
This year has been crazy for photography: I started writing for two online photography publications, vlogging on YouTube and blogging here. As I funnel more time and energy into landscape photography, I’m rediscovering my perfectionist tendencies. After all, photography (and writing) is an art — what artist wants to show or publish less than perfect artwork?
In spending 20–30 hours a week on photography-related work, I find myself improving at shipping things that are 80% “good enough” out of sheer need.
So when I get not-infrequent comments to the effect of “the production quality is awful” or “I just wasted my time reading this,” my first instinct is bitterness. But after a few minutes, it quickly turns into self-reproach: why isn’t my work — vlogs, articles or photos — perfect like the old days?
Should I dig out my old perfectionist tendencies so I can safely return to being my only critic?
“Better to do something imperfectly than to do nothing flawlessly.”
— Robert H. Schuller
My 60% “good enough” a month from now will be today’s 80%. In the long term, imperfect work will become more perfect while providing utility to people now. The challenge is to convince myself that providing utility now is worth the unkind words.
I think of the small businesses and private ventures my friends operate, and realize I’m guilty: not of making discouraging comments about their efforts, but omitting to exhort them. It’s not enough to not be a jerk — it’s my privilege and responsibility to encourage my peers who are doing things in spite of disparaging comments.
I have a challenge for you: this next week, pick one person or business who is doing something, and exhort them. Be their cheerleader. It’s as simple as leaving a thoughtful comment on their social media post or sending a text message. You will make their day. You may not use their product or think it’s tacky, but that’s not the point: encouraging our colleagues is the least we can do to invest in someone’s well-being.
The product — tacky, low production quality or otherwise — will improve with time. So invest a little of your time to feed them with the encouragement they need to stay strong.
It’s a free, easy way to practice empathy — and that’s a life skill we could all stand to perfect.
]]>
As a new photographer, it’s common to stagnate or lose steam — but even if you’ve kept up the momentum for some time, you will still plateau and face the challenge of continuing to grow.
To become a successful photographer, you just need to keep up what you’re doing, right? Many photographers would give a “yes, but” answer and rightly exhort you to reach further. The common recommendations for advancing in your craft might be:
- Shoot more often
- Try shooting a new genre
- Imitate another photographer’s style
- Imitate the path of successful photographers
All good advice — except for one: “Imitate the path of successful photographers.”
Wait, should we imitate unsuccessful photographers? Not exactly, that’s not the logical antithesis. Rather, you should concentrate on learning from unsuccessful photographs — especially those in your own portfolio.
To motivate this, ask yourself the question: what is your objective as a photographer? Why do you spend more time in photography whenever you can?
- To become the best in your craft?
- To fund your photographic endeavors?
- To make a full-time living from photography?
- To develop a reputation?
If your current priority is to become the best in your craft, imitating successful photographers is actually the irrational way to maximize your learning. You will grow and you can be successful in your field this way, but if you want to maximize your time investment, it’s worth cultivating smarter habits that accelerate your learning.
Trying to learn from successes while neglecting failures is a cognitive bias called Survivorship Bias. It’s a selection bias: the only data-points we see are those which made it past a certain filter that imparts a bias on the data. Abraham Wald played a critical role during World War II when he identified Survivorship Bias in strategies for armoring bombers.
Survivorship Bias is the equivalent of being handed a set of even numbers and making the observation “oh, all these numbers are even!” You’d be absolutely right, but you’ve learned no new information because the even numbers were already selected. What you stated was true, but yielded no new information — like how to generate an even number from scratch.
You learned nothing.
Success stories are an example of selection bias. We only see successes — people, photos, products — that made it past the selection process, and that selection process imparts a non-trivial selection bias on the data-points due to marketing, timing or difficult to replicate effects.
It’s the same in landscape photography: when you spend your time looking at photos you consider successful, you aren’t learning much new information. After all, these photos already meet your criteria of a successful photo, but given a photo that doesn’t quite meet those criteria, you won’t know how to get there beyond starting from scratch with another photo.
So although you can grow from analyzing successful photographs, it’s far from the best way to spend your learning efforts. You already have a phenomenal data source to facilitate smarter growth: all your photos you didn’t like from a shoot!
Here’s how you can turn those rejected shots into actionable insights to accelerate your growth.
1. Take notes in the field
While you scope out locations and dial in camera settings, record your brainwaves. Are you hesitating to pull out the tripod because it’s a pain to put back? What does it feel like to get out for an early dawn shoot? These are important vital signs to track: they will produce accurate, actionable course corrections sooner rather than later.
On my last trip to Oregon, I kept missing twilight because I was anxious about hiking back in the dark. I’ve done this on so many trips without remembering to fix the issue, but this time I finally took notes to that effect. The next day, I purchased a headlamp and was able to hike fearlessly into twilight. Yes, I was stupid not to have done that before — but I suppose being stupid is human nature.
2. Journal about the experience
One or two times a day, journal about the day’s experience. Voice recording is a great way to get these out quickly and capture raw thoughts that congeal into a story. I love recapping everything that happened during the day — random things that made me smile, frustrations and adventures. It may feel like a rehash of taking notes in the field, but I find I tend to see recurring patterns better when I take notes throughout the day and only journal once a day.
3. Edit photos immediately
Every day is precious, so the fastest way to improve is to close the feedback loop. I usually edit the prior shoot’s photos at noon and in the evening an hour after the sunrise or sunset shoot. Although the edit I produce is rarely exceptional, I’ll quickly spot issues that I wouldn’t otherwise notice in-camera. But don’t spend too long editing the photos you like!
4. Critique rejected photos
The key to defeating survivorship bias is to spend most of your time analyzing the photos you don’t like. You may be tempted to spend your time editing killer shots to perfection, but what about all the other photos you took that didn’t make the cut? Why don’t they work, and what would it take to make them work next time? You don’t want to make the same mistakes again!
So rather than spend all your time focusing on the photos that look great — and are probably just like your existing portfolio — scan only through those that didn’t quite work out.
5. Hold a retrospective
What caused these failed shots? Did you overlook the composition? Overexpose a shot? Did you spend too long at one spot, only to find it was a bad angle? It’s not enough to pick out why a photo doesn’t work: you need to hypothesize what caused the failure!
6. Write down an action list
What are you going to change to squelch these issues? Write down what you are going to do differently for this evening or tomorrow’s shoot so you can close the feedback loop.
“The faintest ink is more powerful than the strongest memory.” Don’t cheat yourself into thinking you’ll remember to address these issues in the field, write them down. When you arrive for the shoot, explain to yourself how you are addressing each issue right now.
Beating survivorship bias
These steps may seem like busywork, but that’s exactly why we tend to waste so much time in the learning process: we neglect the simple steps that empower us to learn with intentionality. Why take a week to learn passively from your mistakes, instead of taking one day to overcome them?
So take control of your learning! Learning with intentionality is one of the most rewarding ways you can get more for less as a photographer.
Make sure to subscribe to the Yellowscale YouTube channel to keep up with new digital nomad, travel and landscape photography tips!
]]>